Hi there,
There’s nothing worse than gearing up to tackle your yard work and finding oil dripping from your string trimmer. Believe me, I’ve been there too! This common issue can be due to the incorrect oil and gas mixture or even a dirty carburetor, among others.
In this blog post, we’re going to dive into the why and how of these pesky leaks so you can swiftly get back on track with your lawn maintenance. Ready for troubleshooting? Let’s dig right in!
Key Takeaways
- Incorrect oil and gas mixture is one of the most common reasons for a string trimmer to leak oil. It’s important to use the correct fuel-to-oil ratio recommended by the manufacturer.
- A dirty muffler can cause pressure buildup in the engine, leading to oil leaks. Regular cleaning or replacement of the muffler can prevent this issue.
- A dirty carburetor may disrupt fuel and air mixing, resulting in oil leakage. Cleaning or rebuilding the carburetor can solve this problem.
- Leaks in the fuel or oil lines can also cause oil leaks. These should be inspected for any cracks, holes, or loose connections, and repaired or replaced accordingly.
Why Is My String Trimmer Leaking Oil?
There are several possible reasons why your string trimmer is leaking oil, including an incorrect oil and gas mixture, a dirty muffler, a dirty carburetor, or even a leak in the fuel or oil lines.
Incorrect oil and gas mixture
In my experience as a lawn owner, an incorrect oil and gas mixture is one of the most common culprits behind your string trimmer leaking oil. To put it simply, if you’re using a 2-stroke engine like in a Stihl weed trimmer or Echo SRM-225 trimmer, you need to ensure that your fuel to oil ratio is perfect.
For example, with a Stihl weed trimmer the recommended ratio is 50:1 gas to oil. If the mix is wrong, it can cause problems such as making the engine smoke excessively or lead to dripping oil from the exhaust because two-stroke oil needs proper blending with fuel for clean combustion and lubrication.
Additionally, stale fuel left out for long periods could adversely affect your trimmer’s performance and trigger an annoying leaky problem.
Dirty muffler
A dirty muffler on your string trimmer can quickly become a leaking oil issue. Over time, dirt and debris accumulate in the muffler, leading to inefficient operation of your equipment.
The buildup interferes with the proper expulsion of exhaust gases from the engine compartment. This causes an increase in pressure that forces oil out through any weak spots or openings like seals and gaskets, resulting in leaks.
Cleaning or replacing a dirty muffler reduces the likelihood of this unwanted pressure build-up. Regular maintenance routines not only keep these problems at bay but also significantly extend your string trimmer’s lifespan by ensuring optimal performance.
Do note that failing to address such concerns promptly could escalate into more serious issues down the line, such as impaired efficiency and potential damage to other parts due to excess oil leakage.
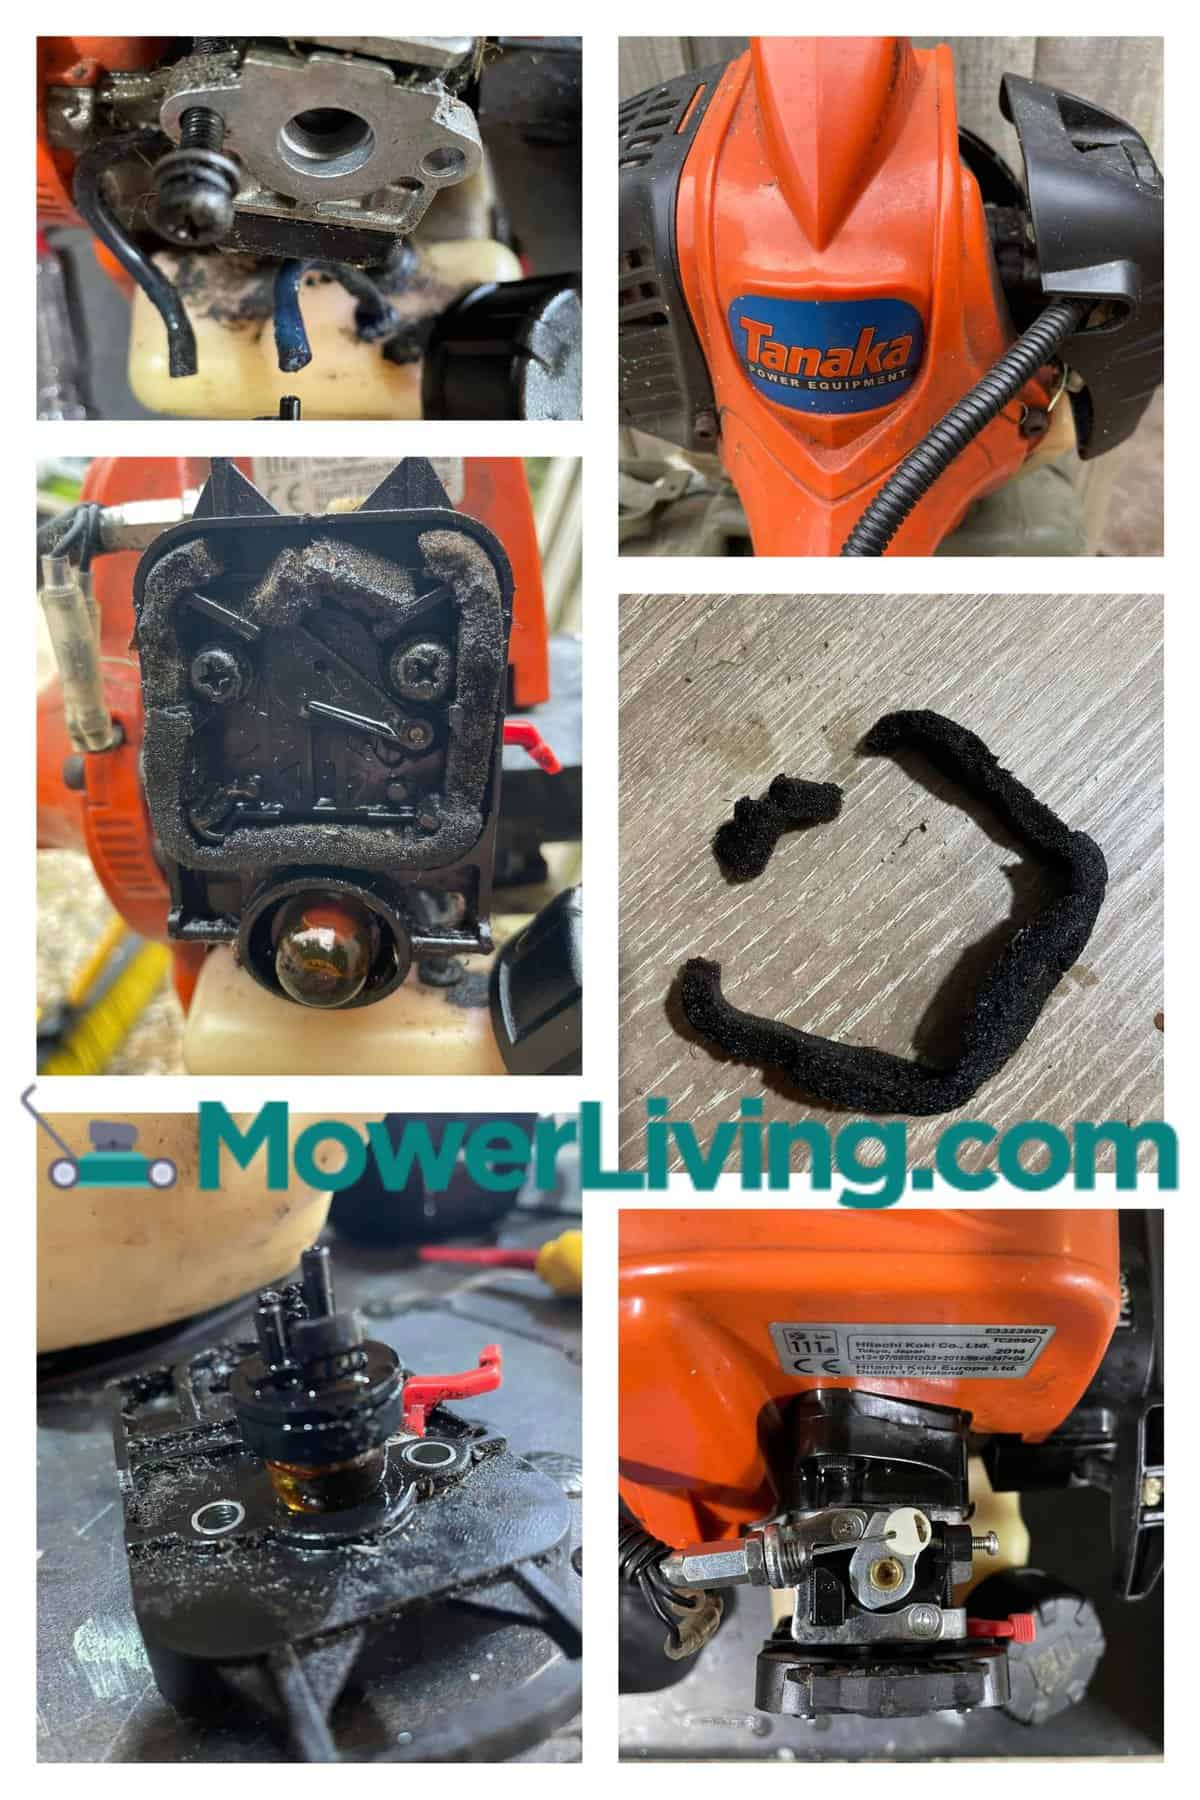
Dirty carburetor
Having a dirty carburetor could be the key reason as to why your string trimmer is leaking oil. The carburetor, a core component in your trimmer’s engine, mixes fuel and air for combustion.
Over time, this part may accumulate unwanted dirt or residual oil particles that could disrupt its function leading to oil leakage. This problem might also cause fuel leaks through the air filter especially in Echo and Stihl trimmers.
Cleaning or rebuilding the carburetor isn’t just mandatory but can essentially solve the issue of a leaky string trimmer saving you from damage costs down the line. However, if ignored, it can lead to major engine problems prompting an extensive repair process.
Leaking gas or oil
One common reason for a string trimmer to leak gas or oil is due to a cracked fuel line. This can happen over time as the trimmer is used and the fuel line becomes worn or damaged.
Another possible cause is a leak in the carburetor, which can result in gas leaking out of the trimmer. Additionally, if there are any cracks or damage to the housing of the trimmer, it can cause oil to leak during operation.
It’s important to address these issues promptly, as leaking gas or oil can not only be messy but also affect the performance and lifespan of your string trimmer.
How to Fix String Trimmer Oil Leaks
To fix string trimmer oil leaks, you can check and adjust the oil and gas mixture, clean or replace the muffler, clean or rebuild the carburetor, and fix any leaks in the fuel or oil lines.
Read on to learn more about these solutions!
Read more: Can String Trimmer Cut Skin? Is Your String Trimmer Dangerous?
Check and adjust the oil and gas mixture
If you’re experiencing oil leaks from your string trimmer, one of the first things you should check is the oil and gas mixture. This is an essential step in maintaining proper lubrication for two-stroke engines like those found in many string trimmers. Here’s what you need to do to check and adjust the oil and gas mixture:
- Find out the correct ratio: Different trimmers require different ratios of oil to gas for optimal performance. Check your trimmer’s manual or manufacturer’s website to find the recommended ratio.
- Measure the amounts precisely: It’s crucial to measure the oil and gas accurately to maintain the correct ratio. Use a fuel measuring container or a graduated cylinder to ensure precise measurements.
- Mix thoroughly: Pour the correct amount of two-stroke oil into a fuel container, add a small amount of gasoline, close the container tightly, and shake it vigorously for several seconds. This ensures thorough mixing of the oil with gasoline.
- Add remaining fuel: Once you’ve mixed a small amount of gasoline with the oil, pour it back into your fuel container and add the remaining gasoline. Shake the container again to ensure proper mixing throughout.
- Refill your trimmer: Empty any old or contaminated fuel from your trimmer’s tank before refilling it with the freshly mixed fuel.
Clean or replace the muffler
One of the possible causes of oil leaks in your string trimmer is a dirty or damaged muffler. The muffler plays a crucial role in reducing the noise and emissions produced by the engine. Over time, carbon deposits and dirt can build up inside the muffler, obstructing proper exhaust flow and causing oil to leak out.
- Allow the trimmer to cool down completely before attempting any maintenance.
- Locate the muffler, which is usually positioned near the engine on the side or back of the trimmer.
- If there is excessive dirt or carbon buildup on the external surface of the muffler, gently brush it off using a soft-bristle brush.
- Use a screwdriver or wrench (depending on your model) to remove any screws or bolts securing the muffler in place.
- Carefully detach the muffler from its connection point without damaging any surrounding parts.
- Inspect the interior of the muffler for clogs or carbon buildup. If you notice significant blockages, it may be necessary to clean it more thoroughly or replace it entirely.
- To clean the muffler, soak it in a mixture of warm water and mild detergent for about 15 – 20 minutes. Then, scrub away any remaining carbon deposits using a brush with stiff bristles.
- Rinse off any soap residue thoroughly with clean water and allow the muffler to dry completely before reattaching it to your string trimmer.
- Once dry, reattach and secure the muffler using screws or bolts according to your trimmer’s specifications.
Clean or rebuild the carburetor
One common reason why your string trimmer may be leaking oil is due to a dirty or malfunctioning carburetor. The carburetor plays an essential role in mixing the proper amounts of fuel and air to create combustion in the engine. Over time, dirt and debris can clog the carburetor, disrupting this delicate balance and causing oil leaks.
- Start by turning off the trimmer and disconnecting the spark plug wire for safety.
- Locate the carburetor on your trimmer. It’s usually located near the engine and has fuel lines connected to it.
- Remove the air filter cover and air filter to access the carburetor.
- Using a small brush or toothbrush, gently remove any visible dirt or debris from the outside of the carburetor.
- Next, unscrew any screws or bolts that hold the carburetor in place.
- Carefully detach any fuel lines connected to the carburetor, taking note of their positions for reassembly later.
- Once removed, submerge the carburetor in a cleaning solution specifically designed for carburetors.
- Allow it to soak according to the manufacturer’s instructions, usually around 10 – 15 minutes.
- After soaking, use a soft brush or toothbrush to scrub away any remaining dirt or debris from all parts of the carburetor.
- Rinse thoroughly with clean water and ensure all openings are clear and free from blockages.
- Finally, reassemble all components back onto the trimmer in reverse order.
Fix any leaks in the fuel or oil lines
When addressing oil leaks in your string trimmer, it’s crucial to check for any leaks in the fuel or oil lines. Here are the steps to fix these leaks:
- Inspect the lines: Carefully examine all the fuel and oil lines connected to your trimmer. Look for any cracks, holes, or loose connections that could be causing the leak.
- Replace damaged lines: If you notice any damage, it’s essential to replace the affected lines. Make sure to use the proper replacement parts recommended for your specific string trimmer model.
- Tighten connections: Ensure that all connections are properly tightened to prevent any leakage. Use a wrench or pliers if necessary but take care not to overtighten as it might cause further damage.
- Use sealant: Applying a high-quality sealant specifically designed for fuel and oil lines can help prevent future leaks. Follow the manufacturer’s instructions on how to apply the sealant correctly.
- Test for leaks: Once you have addressed any visible issues, start up your string trimmer and carefully observe if there are still any signs of leakage from the fuel or oil lines. If you notice any continued leaks, double-check all connections and repeat the previous steps if necessary.
Conclusion
In conclusion, if you find your string trimmer leaking oil, there are several potential culprits to consider. Incorrect oil and gas mixture, a dirty muffler or carburetor, and leaking fuel or oil can all contribute to this issue.
By addressing these issues through proper maintenance and troubleshooting, you can easily fix string trimmer oil leaks and keep your equipment running smoothly. Don’t let an oil leak hinder your lawn care efforts – take action today to ensure optimal performance from your string trimmer!