Hello
Growing fall mums can be tricky, right? It’s easy to make mistakes, but each one teaches you something new. Garden mums do their best in USDA zones 5 to 9 with plenty of sunlight.
Stick around, and I’ll share tips to help you avoid common missteps and keep your mums happy and healthy. Let me share more!
Contents
- 1 Types of Fall Mums
- 2 How to Avoid Common Mistakes While Growing Fall Mums
- 3 Tips for Successful Fall Mum Cultivation
- 4 Conclusion
- 5 FAQs
- 5.1 1. What are fall mums, and how do they differ from garden or hardy mums?
- 5.2 2. How much sunlight do fall mums need?
- 5.3 3. What type of soil is ideal for planting fall mums?
- 5.4 4. How often should I water my fall mums?
- 5.5 5. Why is pinching important when growing fall mums?
- 5.6 6. Can pests like aphids damage my garden moms?
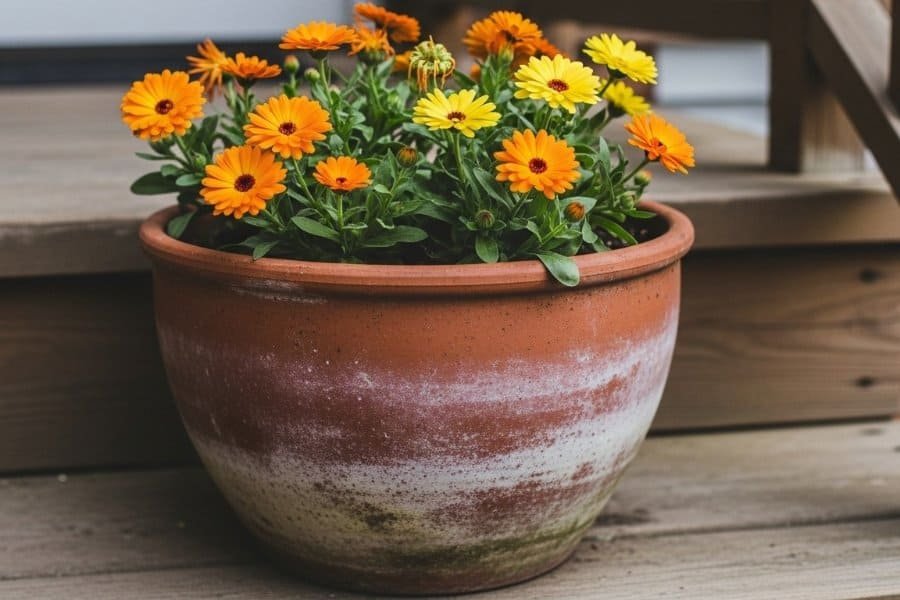
Types of Fall Mums
Fall mums come in different types, each with unique needs. Picking the right one can make all the difference for your garden or pots!
Garden Mums (Hardy Mums)

Garden mums, also called hardy mums, thrive outdoors in USDA Zones 5 to 9. These plants survive cold winters if planted early enough. I plant mine in late summer or early fall, about 6 to 8 weeks before the first frost.
This gives their roots time to grow strong for winter.
They need full sun and require well-drained soil. Avoid heavy clay soil or compacted dirt that holds water. Good drainage protects them from root rot during rainy seasons. Mums bloom beautifully year after year when cared for properly, making them great landscape plants!
Florist Mums (Pot Mums)

Florist mums are meant for indoor decoration. I often see them in grocery stores or at florists. These potted plants look stunning with their bright blooms, but they are not cold hardy like garden mums.
They are grown to last for a short time inside, usually during fall.
Planting florist mums outdoors will disappoint you. They cannot survive cold winters and won’t return in spring. I keep these indoors as houseplants and toss them once the flowers fade.
Their shallow root system makes them unsuitable for outdoor gardens anyway!
How to Avoid Common Mistakes While Growing Fall Mums
Growing fall mums can be tricky if you’re not careful… small errors can ruin their beauty. Let’s make sure your plants thrive by sidestepping common issues!

Avoid Planting at the Wrong Time
Planting fall mums too late hurts their chances to survive the winter. I always plant hardy mums in spring or early fall, about 6–8 weeks before the first frost. This gives enough time for roots to grow strong before cold weather arrives.
Buying mums late in the season is a common mistake. By then, they don’t have enough time for proper root development. Spring planting works best because it allows mums to settle into the soil and thrive during their growing season.
Ensure Adequate Sunlight
Mums need at least six hours of direct sunlight every day. I always make sure my plants get full sun in the morning and midday. In USDA Zones 8 to 9, some afternoon shade helps protect them from heat.
Without enough light, they grow tall and weak with fewer flower buds.
I’ve seen mums thrive best in open spaces without nearby trees or large shrubs. Partial sun can work for a short time, but it’s not ideal for healthy growth or blooming. Placing potted mums near a south-facing window also works if grown indoors.

Improve Soil Drainage
Waterlogged soil can harm root systems and stunt growth. I fix this by mixing compost and sand into garden soil. This boosts drainage, especially in heavy clay soil.
For potted mums, I only use containers with drainage holes. Excess water drains out, preventing root rot. Well-draining potting mix also works wonders for moist but not soggy roots.
Follow Correct Watering Techniques
I always check soil moisture before watering mums. For container mums, I feel the top 1–2 inches of soil. If it feels dry, I water deeply at the base of the plant. This keeps leaves dry and helps prevent diseases like powdery mildew.
In garden beds, I focus on keeping moist soil without overwatering. During dry spells, I give a deep soak once or twice weekly to support root growth. Too much water can lead to root rot, so well-drained soil is key.
Proper drainage holes in pots help avoid standing water too!

Maintain Regular Fertilization
I feed my fall mums with a balanced fertilizer, like 10-10-10, in spring or early summer. This helps the root system grow strong and healthy. Once I see flower buds forming, I switch to a high-phosphorus fertilizer, such as 5-10-10.
Phosphorus supports blooming and makes the flowers vibrant.
Fertilizing too late can make the plants leggy or delay blooms. I stop feeding them once the buds form to avoid these issues. Healthy fertilization ensures better soil nutrients and beautiful fall mums every year!
Pinch Back New Growth Timely
I pinch off the top inch of each stem in early spring once my mums grow 6 inches tall. This step helps make the plants bushier and prepares them for more blooms.
I keep pinching every two or three weeks until mid-July. Skipping this makes stems too tall, thin, and weak. Fewer flowers grow without regular pinching, so I stay consistent during the growing season.
Prepare for Winter Properly
Leave the foliage on your fall mums after they bloom. It acts like a natural blanket and protects the roots in winter. Cut old stems to about 12 inches in early spring for fresh growth.
Add a layer of mulch, 2 to 4 inches deep, after the first hard frost. Use straw or shredded hardwood for this. In colder areas, give extra protection to help mums survive freezing temperatures.
Tips for Successful Fall Mum Cultivation
Growing fall mums takes some care, but a few simple tips can make them thrive—read on to learn how!

Choose the Right Planting Season
I plant hardy mums in late spring. This gives roots time to grow before winter hits. Late summer or early fall works too, but I aim for 6–8 weeks before the first frost. Starting early helps my mums handle cold better.
Florist mums are different. These work best in pots or bedding as they can’t survive frosty winters like garden mums do. Timing matters, so I check my USDA zone (5 to 9) and plan carefully for each type of mum!
Provide Sufficient Sunlight
Mums need at least 6 hours of full sun each day. Without enough sunlight, they grow weak and produce fewer blooms.
I place my garden mums in open spaces where shadows don’t block the light. If you plant them in partial sun or near trees, their flower buds may not develop well. Sunlight boosts root growth and helps avoid issues like powdery mildew or leaf spots.

Ensure Effective Drainage
I always use well-drained soil for my garden mums. Heavy clay soil holds too much water, which leads to root rot. Mixing in organic matter or using a sandy garden soil helps water drain better.
For potted mums, I pick containers with drainage holes at the bottom to avoid soggy roots.
If you’re planting in a spot prone to pooling water, raise the beds slightly. This keeps the root system from sitting in moist soil for too long. Poor drainage can also lead to diseases like powdery mildew, so good airflow around plants is helpful too!
Water Properly
I check the soil before watering mums. The top inch needs to dry out a little, but not too much. Wet soil all the time leads to root rot, and that is bad news for plants. I keep the soil evenly moist, which keeps flower buds healthy.
Overwatering can make leaves yellow and weak. Underwatering causes drooping flowers or stunted growth. I watch for signs like these and adjust as needed. Drainage holes in pots help avoid standing water if growing potted mums indoors or outside.

Time Fertilization Correctly
I apply slow-release or balanced fertilizer in spring as soon as I see new growth on my mums. This helps with strong root development early in the growing season.
As flower buds start forming, I switch to a high-phosphorus fertilizer. I stop fertilizing completely once blooms appear to avoid harming the flowers. Keeping this schedule gives my mums the nutrients they need without overdoing it.
Regularly Pinch Back
I pinch back fall mums until early July. This helps them grow bushier with more flowers. I simply remove the top inch or two of new growth, using my fingers or small garden scissors.
Skipping this step leads to taller, leggy plants that don’t look as full. Pinching also creates more flower buds for a better display. It’s worth the effort and takes only a few minutes per plant!
Protect Mums During Winter
I add a thick layer of mulch, about 2 to 4 inches, after the first hard frost. This keeps the roots insulated from freezing temperatures. Mulch also helps keep soil moisture steady during cold months.
I leave the foliage on until spring. It acts as extra protection for hardy mums in USDA zones 5 to 9. Cutting back too early exposes them to harsh weather. This simple step gives my plants a better chance to survive winter and bounce back strong next season!
Conclusion
Growing fall mums can be easy if you avoid common mistakes. Plant at the right time and give plenty of sunlight. Water wisely, fix bad soil, and pinch for fuller blooms. Protect them in winter to help them survive.
Follow these simple tips, and your garden will thank you!
FAQs
1. What are fall mums, and how do they differ from garden or hardy mums?
Fall mums, also called garden mums or hardy mums, are popular plants for autumn gardens. They thrive in USDA zones 5 to 9 and can handle cooler weather better than florist mums, which are less durable outdoors.
2. How much sunlight do fall mums need?
Fall mums grow best in full sun but can tolerate partial sun if needed. Full sunlight helps flower buds develop properly during the growing season.
3. What type of soil is ideal for planting fall mums?
Well-drained soil with good moisture is key for healthy root growth. Avoid heavy clay soil or compacted soil since these cause drainage problems that lead to root rot.
4. How often should I water my fall mums?
Watering your fall mums regularly keeps the soil moist but not soggy. Too much water can cause powdery mildew or harm their root system.
5. Why is pinching important when growing fall mums?
Pinching helps promote more flower buds and fuller plants by encouraging strong root development early in the season.
6. Can pests like aphids damage my garden moms?
Yes, pests like aphids attack leaves and stems on potted nursery-bought samples; use pest control methods promptly